I’m going to share with you 3 recipes and I’ll also provide my recommendations in terms of what to use, which may also include affiliate links, otherwise known as you helping me to make a little extra on the side at no cost to you.
First things first, the why: I mean, why bother making everything when you can just go buy it? Oh, let me count the ways…
Homemade with love
There’s something about choosing the best ingredients and using all natural products in your cooking, baking or making that makes your heart sing a little bit. It’s kind of like that feeling when you give someone a gift, and you are so excited for them to open it and see what’s inside, you know?
Like, if I’m heading to a potluck, I feel very different when I make something vs buying something at the store.
You know exactly what’s in it and how it’s made
I can’t tell you the amount of times I or someone I know have been bamboozled into buying something that is ‘all natural’ or ‘organic’ or has ‘no sugar’ only to read the label to find all kinds of things that I can’t even pronounce. I mean, do you read your labels? Because once you start, you will be amazed, and you won’t be able to go back.
… and it’s not allll bad, but for the most part, it ain’t pretty. The less ingredients, the better, that’s my motto.
And it’s not just the ‘all natural’ or ‘organic’ labels you have to be cautious about – It’s ALL labels.
Take your toothpaste as an example – here’s an article I read called ‘How to avoid toxins in your toothpaste’: 12 ingredients to ditch now’ by Mark Burhenne, DDS. You may or may not find these ingredients in your toothpaste because this is a US perspective and all countries will have their own list of approved ingredients for public consumption, but still: it is in your best interest to understand what you’re using. I find the EU and Canada to have stricter rules but nothing surprises me anymore.
So what if you’re that person looking everything up on the label that you don’t recognize – that’s a good thing. We need to question what we’re putting in and on our body because I have been blown away by what our governments deem as ‘safe’. The Environmental Working Group (EWG) is a good resource.
Best Practice: Read everything you read with a grain of salt, and if you’re curious about it, do some research or ask your doctor or health care professional for their thoughts.
You cater to your likes and needs
These days (i.e. as I get older and wiser), I am listening to my body more and more, and I’m more aware of what my body needs, and what works for me.
I’ve also got some routines down that I know make for a better, healthier, and more productive and happier me. Essential oils as an example, they’re a huge part of my everyday – Lemon oil with water to support energy and gut health, Lavender essential oil for sleep and stress support, RC blend for cough and cold support… I could go on, but you can download my free introductory book if you want to learn more about essential oils or email me any time.
The other thing I’ll say here is that it’s no secret that more and more of us get allergies, some of which don’t show up until later in life. My dad, for example, he all of a sudden became allergic to hazelnuts at 55, and another friend became lactose intolerant in her late 20’s – what’s that about?
There are so many substitutes for ingredients that you can use if you or anyone in your family has developed or was simply born with an allergy.
It’s fun! and surprisingly simple!
There are soooo many people who have absolutely amazing recipes. Thank goodness for Pinterest!
Best of all, if you find something that looks a little too complicated, just move on to the next recipe or find some substitutes.
It’s a great way to have fun with the kids, or a great girls’ day or night, even the guys can get together and make their own shaving cream (although, I’m picturing a more solo or couple mission, but I could be wrong!) or shelf unit using refurbished wood.
The sky’s the limit!
It’s a money saver!
Ok team, this is big! Sure, it takes some extra effort but more often than not, you SAVE MONEY! and best of all, you help SAVE THE ENVIRONMENT! Two of my favourite things! PLUS mostly everything you need can be delivered to your house.
The money part: Depending on what you’re making you may have to make a small investment at first, like if you’re making your own foaming soap, you’re going to need to get the foaming soap containers (I like this pack of 4 from Amazon), but that’s a ONE TIME deal, unless they break or something, but now that I think about it, I can’t say I’ve ever heard of this happening, but there’s a first for everything.
The environment part: Think of how many trips to the store and all those foam dispensers that you are not buying anymore and tossing in the garbage.
Same goes for DIY soap or DIY Beauty and skin care – I’m almost embarrassed at how much I’ve spent on face creams and wrinkle creams and all that jazz. At any rate, you’re going to get your soap molds or DIY bottles and then after that you’re set!
Check out these 3 recipes that I’ve tried this week…
Homemade Almond Milk
Ingredients:
- 1 -1.5 cups of almonds
- 4 cups of water
- 1 tsp vanilla extract
- (optional) natural sweetener like honey or maple syrup or dates
- a nut bag or a sieve
How to make:
Soak the almonds for at least 12 hours (you can soak for up to 2 days if you want). Put 1 cup of soaked almonds into a blender and add 4 cups of water, the vanilla extract and sweetener if you’re adding it. Hit the liquify or smoothie setting on your blender a good 2 or 3 times. In between, I like to let the almonds settle a bit before hitting the button again. If there’s a bit of foam at the top, that’s all good.
Over a sieve, pour the almond milk into a bowl (it’s just easier) – use a spoon to move around the pulp and press the pulp to get as much of the milk out as possible. Transfer to a jug, and you’re good to go!
PS If I end up having more than 1 cup of almonds in the blender (because they expand), I’ll make 2 batches, like this attempt hehe.


How to use:
Enjoy this delicious almond milk in smoothies – I made one this morning with strawberries, spinach and blueberries with a pack of Ningxia Red (antioxidant packed drink from Young Living).
The Almond Milk will last you a whole week if you can hold onto it that long 😉
Luxurious Homemade Lotion Recipe
Ingredients:
- 1/2 cup blend of Castor Oil and Avocado Oil (or any other liquid oil – I like these)
- 1/4 cup coconut oil (I like this one)
- 1/4 cup beeswax (I like this one – they’re in pellet form)
- 1 teaspoon Vitamin E oil (optional)
- 3 tablespoon Shea Butter or Cocoa Butter (optional)
- Essential Oils, Vanilla Extract or other natural extracts to suit your preference. (I like 10 drops Lavender + 5 drops Geranium + 5 drops Frankincense)
- Glass jars or tins for storage (I like these mason jars)
How to make:
Combine the liquid oils, coconut oil and beeswax in a double boiler or a glass bowl on top. If using shea or cocoa butter, add it as well. As the water heats, the ingredients will melt. Stir occasionally until melted. Then add vitamin E oil (if using) and any essential oils or scents like vanilla. Then pour into whatever glass jar or tin you will use for storage (makes about 3-4 of the 125ml mason jars).
How to use:
Use like any regular lotion – it is super moisturizing and because it’s more oily than water-based lotions, you won’t need to use as much. Fun Fact! It has a longer shelf life than some homemade lotion recipes since all ingredients are already shelf-stable and no water is added. Use within 6 months for best moisturizing benefits.


Original Recipe by Wellness Mama
Breathe Easy, Sleep Easy Roller Bottle
Ingredients:
- One 10 mL Roller Bottle (I got these)
- 5 drops RC essential oil
- 4 drops Lavender essential oil
- 3 drops Thieves essential oil
- Carrier oil (like coconut oil or avocado oil – I like this set)
How to make:
Put all the essential oils in the bottle, and then top with the carrier oil of your choice.
How to use:
Roll on your chest to relieve cough and cold, and to support a better night’s sleep.
So, what do you think?
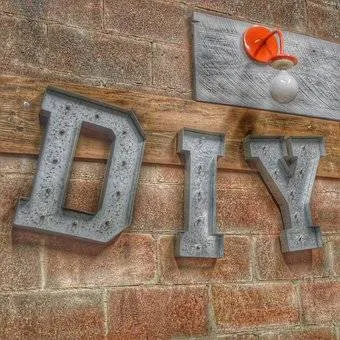
Are you ready to have some DIY fun?! hehe – If you have any questions or recipes to share, I’d love to hear from you.
I am an advocate for using quality, chemical free ingredients, especially when it comes to what I put in and on my body, ’cause you can’t get any closer to home than that my friends.
It’s why I use and recommend Young Living. It’s why I’m passionate about DIY and helping others get back to clean, chemical free living as a Wellness Coach.
Check out this page if you’re curious to learn more about Young Living or essential oils or contact me at any time.
Until next time!
About the Author
Natalia is a Certified Wellness Coach, Yin Yoga Teacher, and an Independent International Distributor with Young Living. She is a #1 Best Selling Author, holds an MBA and CPA, and now dedicates herself to helping people get back to healthy, clean living so that they can have the energy and mindset to live their best life!
Before transitioning into her role as a Wellness Coach, Natalia worked at one of the top Canadian Wealth Management firms in Canada, acting not only as a coach and mentor to her staff, but also as acting co-chair and mentor to women enrolled in their Women’s Mentorship Program.
Disclaimer:
The information contained on this website is not meant to diagnose, treat, cure, or prevent any disease. If you are pregnant, nursing, taking medication, or have a medical condition, consult your physician or health professional before using these products. Be extra careful when using oils on kids, and do not use on infants under 2 unless recommended or prescribed by your physician or health professional.
Get the Insider News & Blog updates right to your inbox.
[wd_hustle id=”email-subscribe” type=”embedded” css_class=””]


